Task 2 / Ideation & Solution
Instructions
MIB:
Project Brief:
Progress
In week 4, we were starting out on our branding for our product which
includes :
• mood board (including colour palettes, examples, range of fonts,
illustrations, visuals, inspo)
• character/ mascot sketches
• sketched out storyboard for ex promotion video introducing the brand
• website (potential wireframe)
• logo (inspo, sketches)
Task 2: Brainstorming Solutions
Use the defined human-centered problem statement to "think outside the
box" and explore new solutions. Apply ideation techniques like
Brainstorming, Brainwriting, Worst Possible Idea, or SCAMPER to
encourage creative thinking and broaden perspectives. After completing
the ideation process, present your findings to an expert for review.
Me, Ben, and Rachel was mostly in charge of the graphic design related
things, so we work together into creating the idea of fold. starting on
making the mood board and finding references for the packaging, and logos.
so we schedule a meeting to do our work , and brainstorming together to
came up with the moodboard, colour palette, sketches for packaging, logo
mascot, and so on.
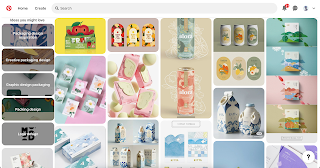
Mood Board
Figure 1.1 Mood Board Provided by Client.
Figure 1.2 Mood Board provided for reference purposes
1. Logo and Mascot
Since the client desired something associated with clouds and softness, we
opted to design a logo and mascot inspired by a cloud character. This
approach creates a playful and inviting image while highlighting the
brand's softness and commitment to sustainability.
Figure 1.4 Inspiration/ References
Figure 1.5 Logo Exploration by me
Figure 1.6 Logo exploration
Figure 1.7 Logo exploration
2. Packaging
Since the packaging combines wet and dry tissues, we decided to create a
playful design: the dry tissue features a cloud sneezing, while the wet
tissue shows the cloud after sneezing. This approach adds a touch of
cuteness to the design.
Figure 1.8 Packaging Design Done by Me and Rachel
3. Refinement
After presenting to Ms. Lilian, we scheduled another client meeting for
feedback. They raised concerns about the mascot, feeling the "sick cloud"
gave a negative impression, as well as issues with the placement of the
barcode and QR code.
Figure 1.9 Client's Feedback, Task Division from Rachel.
After the consultation Me, Rachel and Ben decided to divide our work
afterwards, i was tasked to make a Scandinavian version of the exterior
packaging design and this is what i came up with.
Packaging
Figure 1.10 Scandinavian Exterior refinement Done by Me.
Figure 1.11 Packaging Exploration, QR Code and Logo Placement (Me &
Rachel)
Logo
Figure 1.12 Logo Refinement. (Ben)
After adjusting our work we finalized everything and place it into our
slides.
Submission
Canva Whiteboard:
LinkPresentation Slides:
Link
Task 2 Project Document Submission:
Link
Project Presentation (PPT):
Feedback
Week 4
-
Make sure to focus on the development and process, and don’t forget
to explain the reasoning behind every decision you make.
Week 5
-
Start the presentation with a brand introduction instead of jumping
straight into the mood board. Think of it like presenting directly
to the client, so be clear and detailed.
-
Include the early stages of brainstorming and idea development in
the presentation.
-
Keep in mind that we’re only providing digital artwork, not physical
packaging or products.
Reflection
Working on the branding project was a really fun and rewarding experience. I got to dive into creative ideas and really get involved in the design process. Of course, it had its challenges. One big hurdle was working with different perspectives within the team, especially during the brainstorming phase. We had to communicate a lot and find common ground, which made me realize how valuable teamwork and adjusting to others' viewpoints can be.
Another challenge was the client’s feedback, which was sometimes pretty vague. It was tough to figure out exactly what they wanted, but it pushed me to ask more questions and think outside the box to meet their needs. In the end, Rachel and I were on the same page, which made working together much smoother.
I also learned a lot about design and how small changes can totally change the message or feel of a project. This project helped me improve my research skills too, as I had to explore different design trends to find the best options. Overall, this experience not only boosted my technical skills but also gave me a better understanding of how to work on design challenges as a team.


Comments
Post a Comment